
Digital Display Menus - FAQ
Note: You will need to set up a custom device with TV dimensions the first time. All subsequent times you can select the one that has already been created.
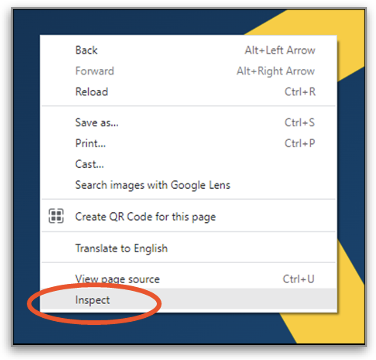
Open Chrome and right click the screen and select inspect.
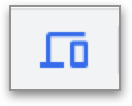
On the right-hand side, click on the icon that looks like a cell phone:
A pop-up called Dimensions will appear on the left-hand corner:
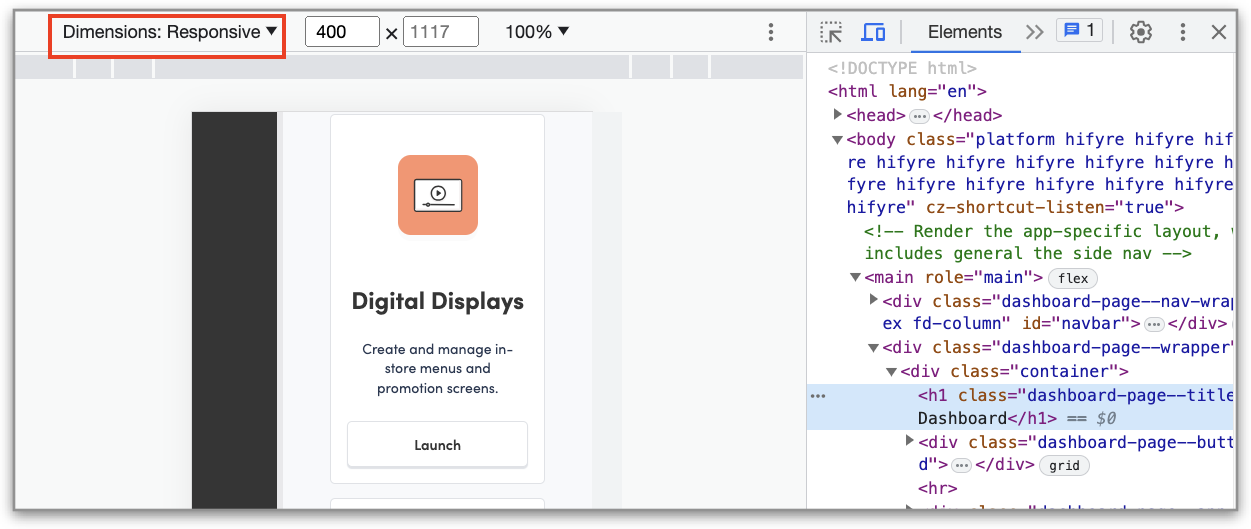
Click on Dimensions and then select Edit from the drop-down:

A new sidebar will open on the right side called Settings. From here, Click on “Add custom device”:
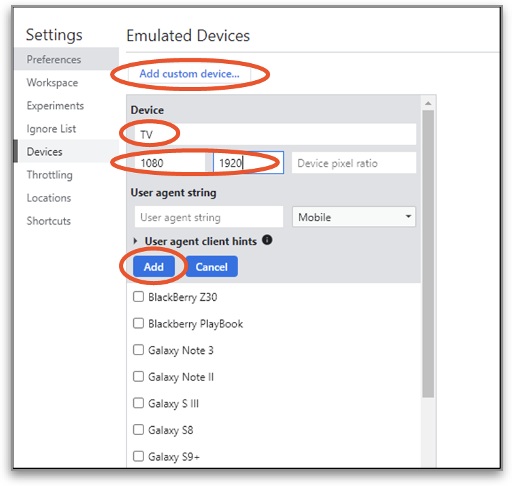
Enter the settings shown above in the fields:
Device Name: TV
Device pixel ratio: 1080 x 1920
Click Add (*you can leave the User agent string field blank)
You will now set the screen to how it will look on your shop TVs. Go back to the Dimensions area. This should now say Dimensions: TV
The small rotate button to the right of Dimension will show you how your TV will look in either the vertical or horizontal view (the vertical or horizontal view can depend on your TV and what you’re displaying).

Click on the desired screen and click on the existing template.
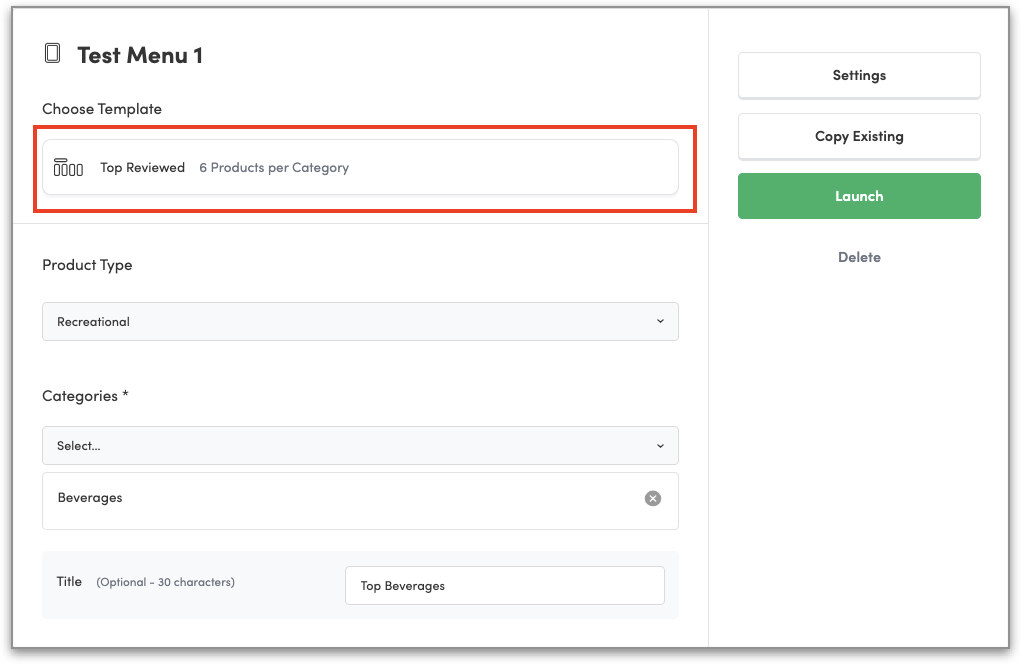
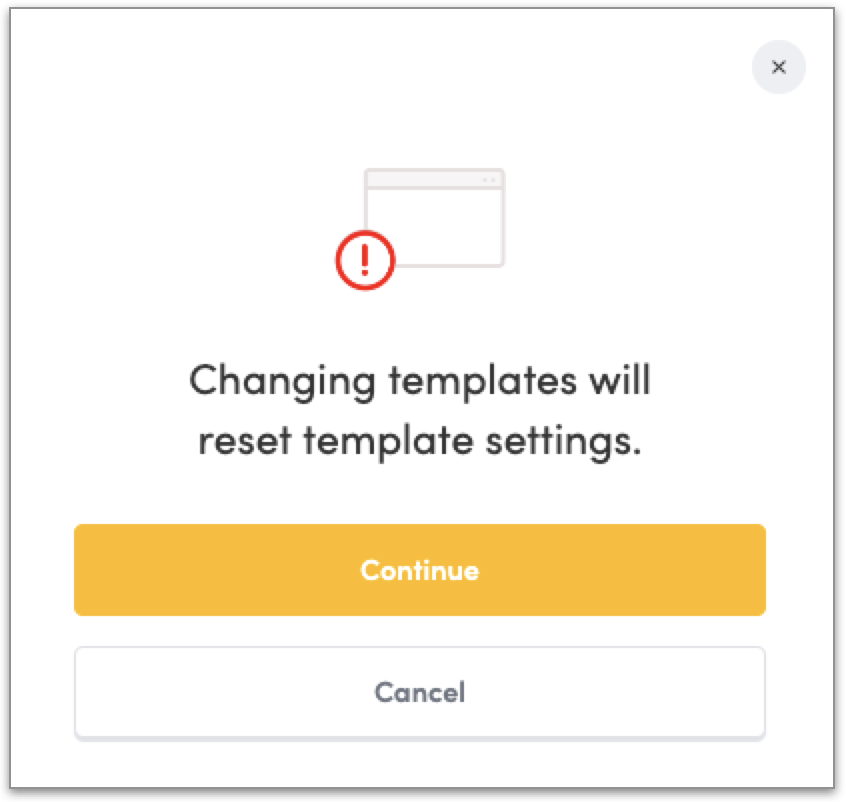
A warning will pop-up to indicate changing templates will reset template settings. Click Continue:
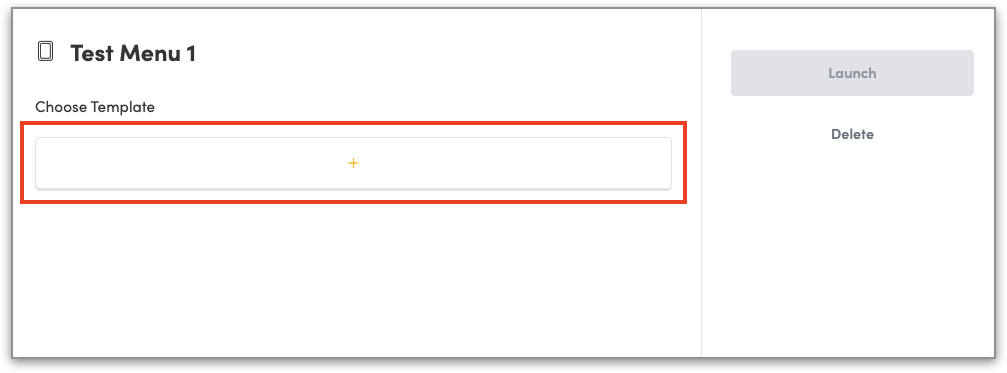
Click on the plus sign under Choose Template:
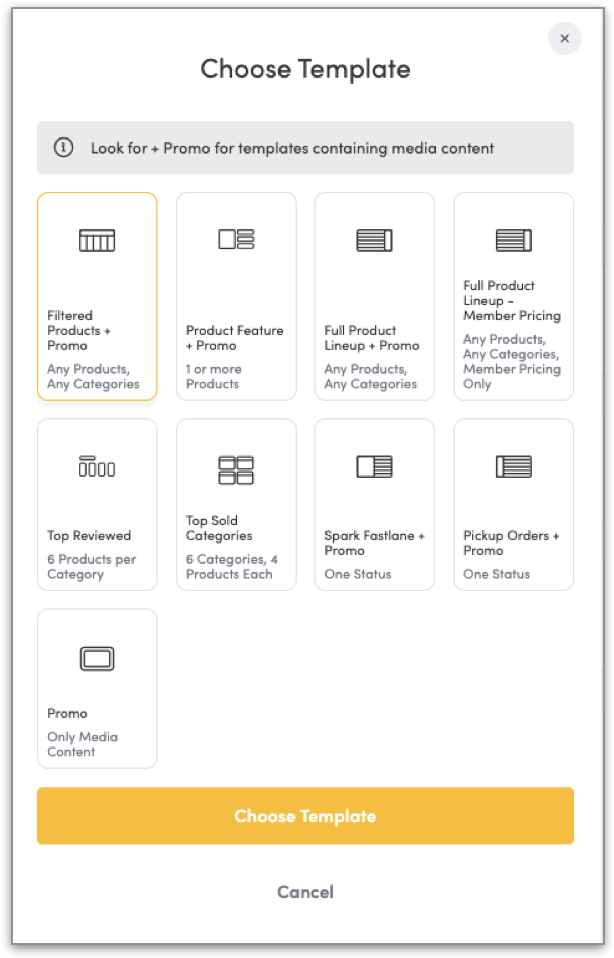
Select your desired template from the list and then click on the Choose Template button:
After you select the necessary menu configuration, click on Save Changes.
Click Launch to preview your menu display.
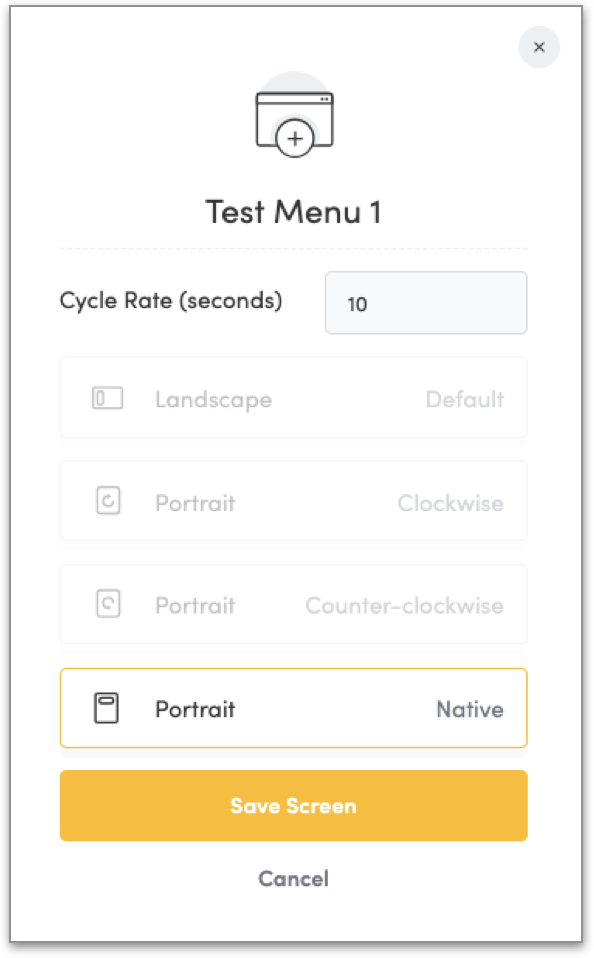
Under Digital Screens, click Add Screen.

Fill in the required fields to setup your test screen:
Add a new screen name (as a best practice, use a title such as TEST Menu 1).
Add your Cycle Rate time.
Select the Orientation.
Once you have filled in the necessary fields, click Save Screen.
Choose your desired template and required product/category options.
Save changes once you are ready to view your new test screen.
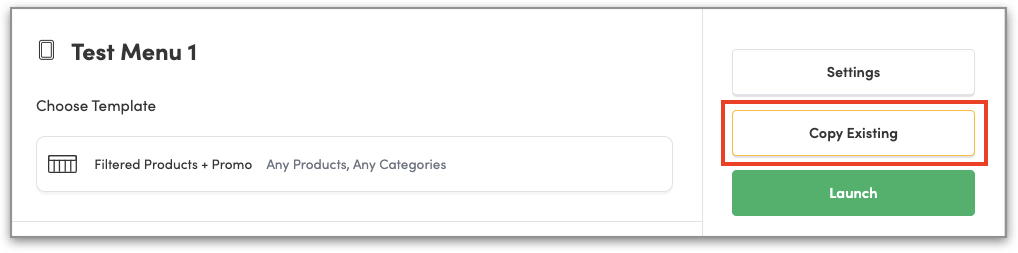
The “Copy Existing” function can be used when you want to copy content from one screen to another. You can change the location of the current menu and move the contents of a TEST menu to a live in-shop menu. To do this:
Select the menu screen and click on Copy Existing:
This will default to your shop. From the Screen dropdown, select the screen you want to copy from.
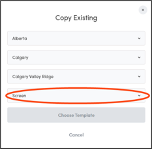
Once you choose the screen, click the yellow Choose Template button.
You should now see an exact copy of the screen that you copied from.
Select the screen and click on Settings.
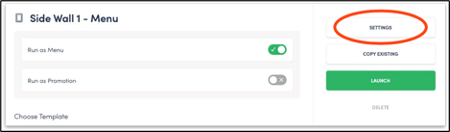
You can update the screen name from here (it’s not visible on the actual digital screen). Ideally, the screen name should include the location in the shop and type of board e.g., Side Wall 1 – Menu
The board speed is called “Cycle Rate”. You can choose how long each page will be displayed on the screen before it shows the next screen. We recommend a speed of at least 10 seconds
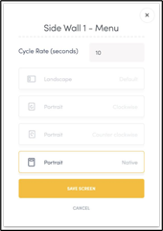
NOTE: You will also see four options that are for your screen orientation. This should always match the orientation of how your TV is hung on the wall e.g., if the tv is horizontal, that equals landscape. Portrait = vertical.